Does This Seem Familiar?
The night shift has just finished the repair, and all that is left is the final shaft alignment. The plant alignment guy and two mechanics head out to the job full of energy and enthusiasm. They are ready. Pre-alignment steps are done. Soft foot is corrected and the laser guy mounts up his equipment on the shafts. The shafts are rotated, and the first set of data is displayed on the screen.
The team attacks the vertical misalignment first. The required shim packs are laid out, the bolts are loosened, the machine is lifted, and the shim packs are inserted. The bolts are retightened, and once again the shafts are rotated. The second set of alignment data is displayed. The laser guy says, "We're just a little out of specification on the vertical, so we need to make one more shim adjustment." The shimming process is repeated and bolts are tightened once again. The third shaft rotation and subsequent data set has the laser guy giving the others a thumbs up.
"OK, the vertical is good to go. Now we need to make the horizontal move." The laser is put into a live function. The bolts are loosened once again. The horizontal adjustment is performed. The bolts are re-tightened. The alignment is re-measured and . . . the machine is once again unacceptable in the vertical axis. You get the picture.
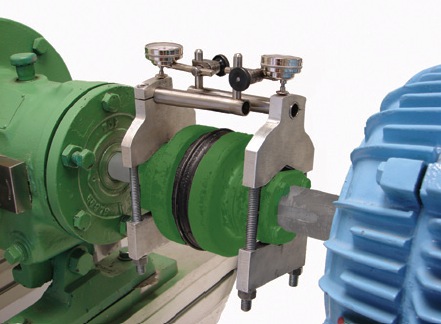
Think about it: this process is rooted in dial indicator methods. Dials are set to zero at 12:00 and rotated to 6:00. The total indicator readings are plugged into a formula or plotted on graph paper to determine the vertical correction at the machine feet where shims are added or removed. The process is repeated until the dial values are acceptable in the vertical axis. Then the horizontal misalignment is corrected. Lasers have offered new ways to measure misalignment, but we are still correcting misalignment the same old way.
A Mental Breakthrough
About 15 years ago, when I was teaching a reverse rim dial indicator course, I had an "Aha! Moment" about correcting horizontal misalignment. I had been teaching folks to calculate the horizontal misalignment at the feet and to place dial gauges at the feet to correct horizontal misalignment. People would often disturb the dials during the process, and the misalignment would need to be re-measured and re-calculated.
It dawned on me that if after sweeping the dials from 9:00 to 3:00, I could adjust the dials ½ of the way back toward zero, they could then be monitored as I moved the machine horizontally. The breakthrough came when I discovered that I could use the dial closest to the movable machine to monitor the front foot adjustment and the dial closest to the stationary machine to monitor the rear foot adjustment. I called this the near-near, far-far principal.
Verti-Zontal is Born
After I realized that dials could become true position sensors, it dawned on me that we are going about the correction process all wrong. If we can correct both the vertical and the horizontal axis with one set of data, we can save ourselves a lot of work and get better results. Most aligners realize that most of the work in the shaft alignment process is not in measuring, but rather in moving the machines into the correct position.
Imagine a completely different scenario:
1. Rotate the shafts. 2. Make a shim change. DO NOT tighten the bolts. 3. Use a live function to make a horizontal correction. 4. Tighten the bolts. 5. Rotate the shafts to remeasure. 6. Document final results. I call this process the Verti-Zontal compound move. Does this sound too good to be true? In fairness, it may take one additional Verti-Zontal compound move to achieve an acceptable alignment.
True Position
I'm pretty sure that the near-near, far-far idea is my original idea, because I've never seen anyone use the technique. By halving the dial values after 180 degrees of rotation, what I was doing was turning TIRs into what I now call true position.
A few years later, I had another epiphany while pondering the validity of the rule: if dials are set to zero and then read every 90 degrees, the sum of the vertical values will equal
the sum of the horizontal values.
Ergo, if dials are set to zero, rotated 180 degrees and then halved, they become true position sensors. The dials can then be rotated and will read true shaft position in whatever axis they are pointing.
Fixturlaser Adopts the Verti-Zontal Compound Move
In all new Fixturlaser shaft alignment systems, the Verti-Zontal compound correction is incorporated into their process. After results are presented, the shim icon will lead the user to a vertical correction screen that graphically shows the shim adjustment. The user is then prompted to make a live horizontal correction. After doing the Verti-Zontal, the user is prompted to remeasure.
Doing the Verti-Zontal
I have been correcting misalignment this way for several years. Correcting both axes as a compound move is a great time saver. The people I have shown this to love doing alignment this way, especially the wrench turners who can get truly worn out when aligning large machines. They love that they have to turn the wrenches many fewer times. The Verti-Zontal compound move can be adopted with most laser systems and works nicely with reverse rim indication. If you are skeptical, I suggest you try this. You will find it makes the whole alignment process more efficient.
David Zdrojewski is the founder and CEO of VibrAlign, Inc. An alignment teacher for almost 30 years, he has written several books and papers on the subject. His articles and papers have been read and enjoyed by at least 14 people. www.vibralign.com