 In this picture the water enters the condenser through the large pipe on the end. (Green Circle) It then travels through the tubes and out the other end. This condenser was approximately 40 feet long.
The product enters the condenser through the pipe that we see in the center of the picture. (Yellow Circle) Between these two entry points there is a thick plate that is called a tube sheet.
The water and the product never actually contact each other but the heat is drawn away by the flow of water through the tubes that are running through the product.
This large plate over the end of the condenser is called the head plate. There is one on each end. We will need to pull these head plates so we can get to the tube sheet. That is where we will find any leak that there might be in this condenser.
Here we see a crew pulling the head off of one end of the condenser. These heads are very heavy and should be moved with a crane or some other device designed for lifting.
The tube sheet is the barrier between the water and the product. It is positioned between the product and water entry and exit points on each end of the condenser. It also holds the ends of all the tubes.
After the head has been removed and the water box has been tested for safe entry (Confined Space) then we will proceed to enter for testing. This is the tube sheet. Here we can see the ends of the tubes that run the full length of this condenser. This is also called the water box. The water comes in here and runs through the tubes and out the other end taking the heat with it. If one of these tubes springs a leak then the product because of the higher pressure is leaked into the water. In this case it was propane, so the vapor cloud above the cooling tower was not all steam; it was partially leaking propane being carried to the tower by the water.

This is where we check for leaks. These tubes are about ½ inch in diameter. There are approximately 2200 of them. To test each one individually from both ends would take for ever. In this case we leave the shell side charged or we de-pressure it a nd then re-pressure it with Nitrogen. That way with the shell side at a higher pressure we can here the leaking tube. These higher pressure usually only needs to be approximately 25 to 30 psi.
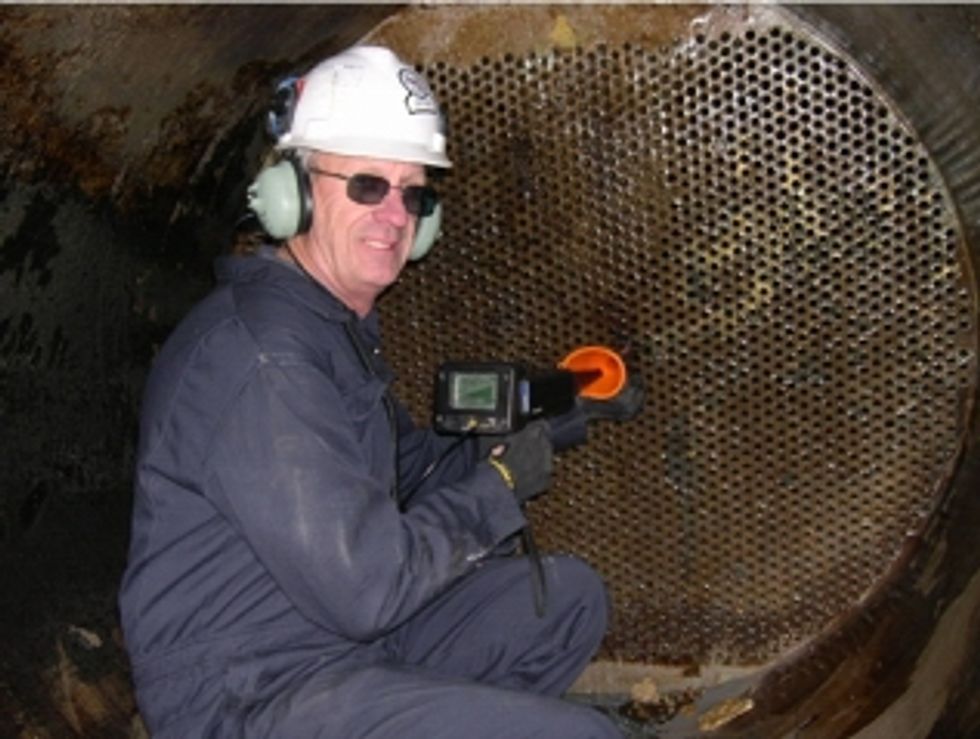
After the water box has been cleared by operations and all safety measures are in place we actually get into the water box and listen for the leak with the UE SYSTEMS ULTRAPROBE 10000.
Once inside the water box and using the gross to fine method we can determine where the leak is. At 25 to 30 psi differential it is very easy to find these leaks. After we have located the general area of the leak then I take a cheap plastic funnel and place end of the funnel inside the tube. I then use the rubber focusing module check inside the funnel and hear the leak. I then check outside and all around the funnel. If I hear no leaks outside and knowing that Ultrasound will not penetrate a solid this indicates to me that I have located the exact tube that is leaking.
This tube is usually plugged and then we go to the other end and plug the other end as well. This takes that tube completely out of operation and the unit can be reassemble and put back on line. I have found condensers with one tube leaking and I have found them with several tubes that leak, be sure to check them all closely.
This entire operation took approximately 4 hours from start to finish.


 In this picture the water enters the condenser through the large pipe on the end. (Green Circle) It then travels through the tubes and out the other end. This condenser was approximately 40 feet long.

 nd then re-pressure it with Nitrogen. That way with the shell side at a higher pressure we can here the leaking tube. These higher pressure usually only needs to be approximately 25 to 30 psi.